March 9, 2022
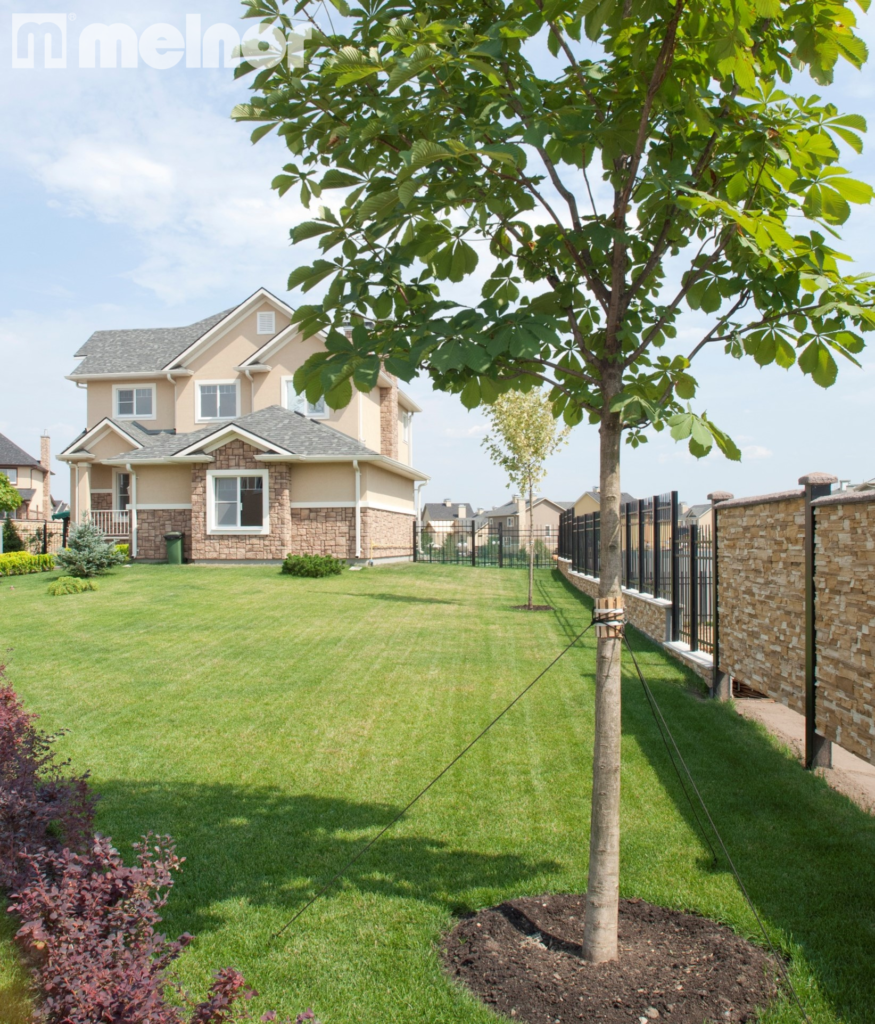
Trees are essential to many aspects of society. Consider trees surrounding our neighborhoods, parks, beaches, schools, and backyards. They create tranquil, visually beautiful environments that are pleasing to the eye. They improve our quality of life by integrating natural features and animal habitats into urban areas. And, during the hot summer days, we can enjoy moments of cool shade beneath their canopy. Needless to say, trees provide several benefits. Yet, most are unknown to the average individual.
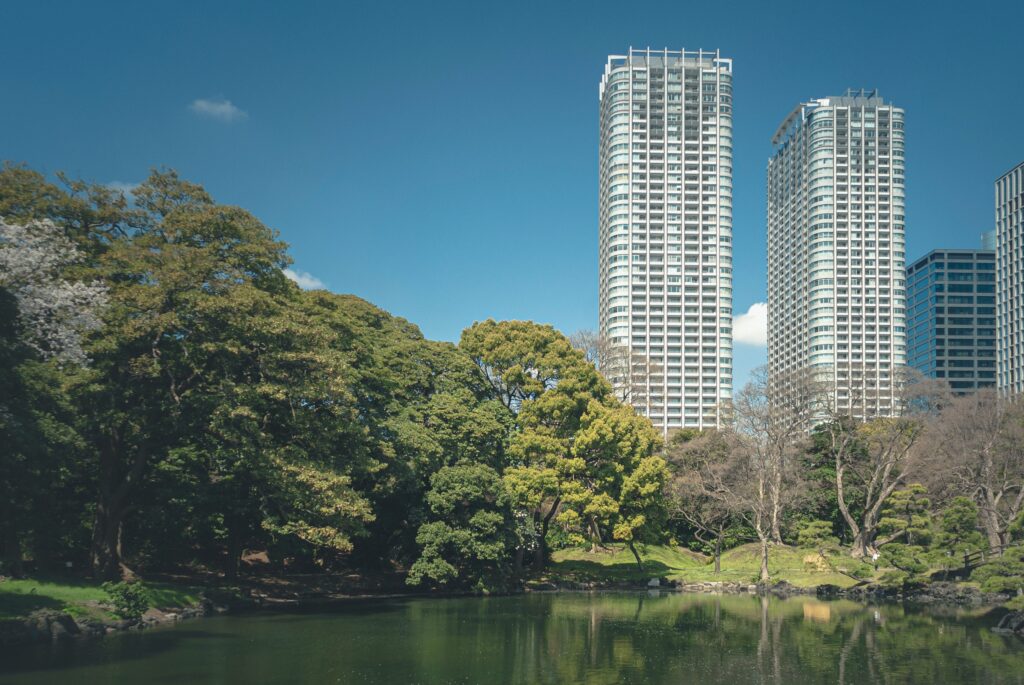
According to the Arbor Day Foundation and U.S. Forest Service, “Trees properly placed around buildings can reduce air conditioning needs by 30% and can save 20-50% in energy used for heating.” They also went on to report, “proper placement of only three trees can save an average household between $100 and $250 in energy costs annually.”
These benefits, including the others published by the Arbor Day Foundation, make growing your own trees essential. However, getting those trees and shrubs off to a healthy start requires proper planning, preparation, and execution to ensure maturation. To help, we have compiled nine crucial steps to keep in mind.
Planning the Location
Decide on a location free of possible disturbances such as utility lines, sidewalks, and driveways. A local arborist or tree care specialist, utility provider, local nursery, or county extension office can help with proper tree placement.
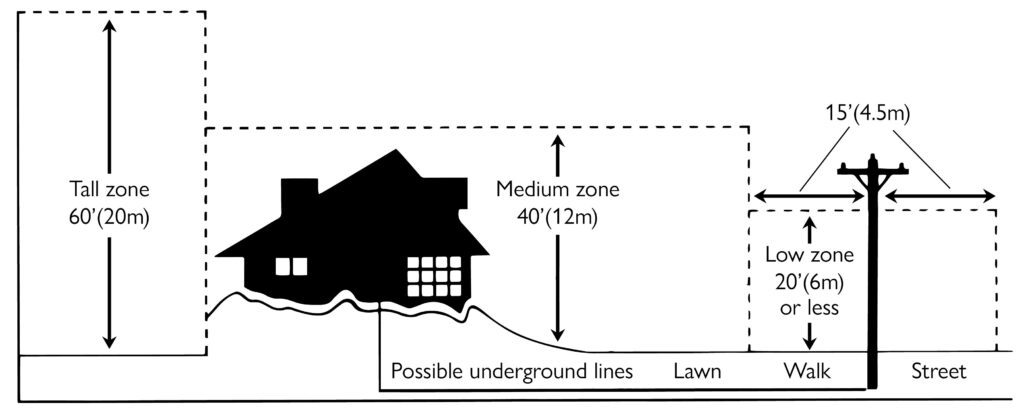
Avoid Utilities. Choosing where to plant a tree is an important choice. Remember to look up and down to see overhead and subsurface utility lines that may interfere with future tree growth.
Overhead Lines. Overhead utility wires are simple to identify yet frequently missed. Planting tall trees beneath or near these lines may ultimately require pruning by your utility provider to maintain safe clearance from the wires. This trimming may give the tree an odd shape. Avoid misshaped tree growth by staying clear of electrical lines. Regular pruning might also cause shortened tree life.
In addition to oddly grown trees, overhead power lines might cause service outages if they are disturbed by the tree. Proper tree selection and placement in and around overhead utilities may avoid possible public safety issues, lower utility and customer costs, and improve landscape attractiveness.
Underground Lines. Trees are made of much more than what’s above ground. The root area under the soil is typically larger than the branch spread. Roots typically spread many times the size of the treetop and may extend beyond the tree’s height. Thus, you may risk roots damaging underground electric, gas, water, and sewage infrastructure.
The most serious threat to subsurface utilities arises during planting. Accidental digging into underground utilities can result in costly repairs to restore stopped service, as well as possible injury. Before digging, contact your utility provider or a locating service to identify all underground utilities. Never presume that utilities are buried deeper than the depth you want to dig.
Note: The national service line, AKA call-before-you-dig number, is 811. Anyone planning to dig for any reason should call this number to confirm the approximate location of buried utilities. You may also go to your state’s 811 centers online to access this information.
Transplant Shock
Transplant shock is a state of slower development and decreased vitality that occurs after transplanting a tree. Balled-and-burlapped (widely known as B&B) trees lose considerable root development when excavated at the nursery. Transplant shock may also occur in container trees, not often. Proper site preparation, cautious handling to avoid further root injury, and good post-transplant care will encourage faster healing and decrease symptoms of transplant shock. Keep these tips in mind when relocating trees.
What Does Transplant Shock Look Like?
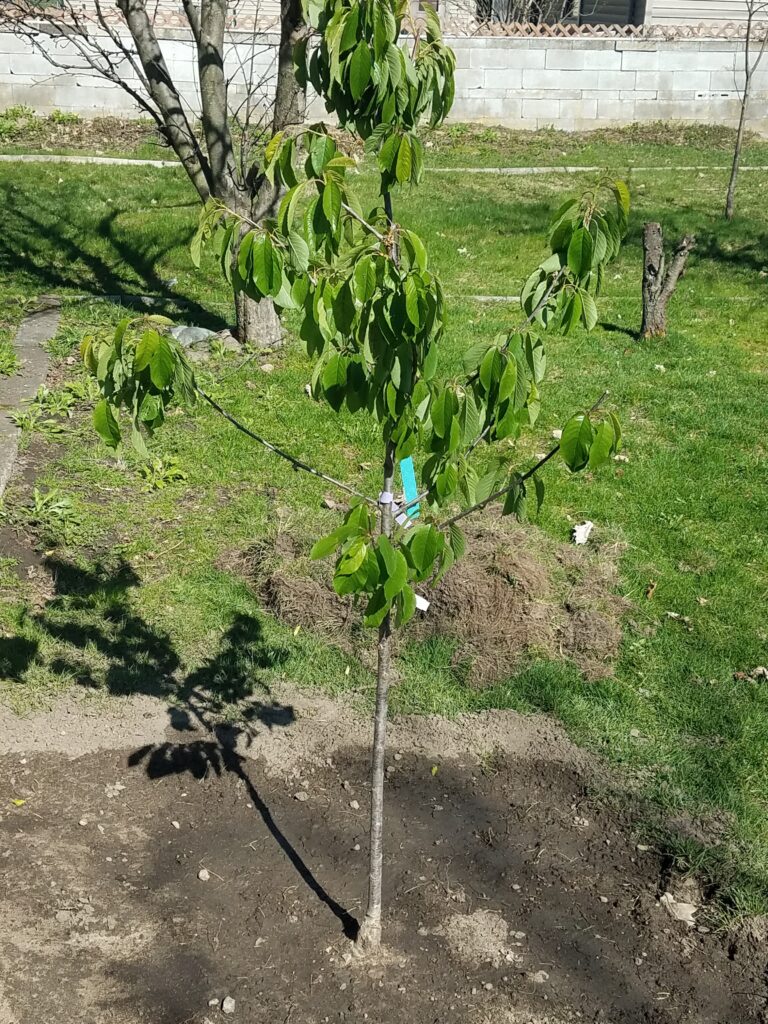
Prepare the Hole
Ensure the planting hole is at least two-to-three times wider than the existing root ball but never deeper than the existing plant depth. Planting too deeply can cause tree and shrub death. Dig the hole deep enough so the root ball is covered, but not too deep that the soil is covering the trunk flare.
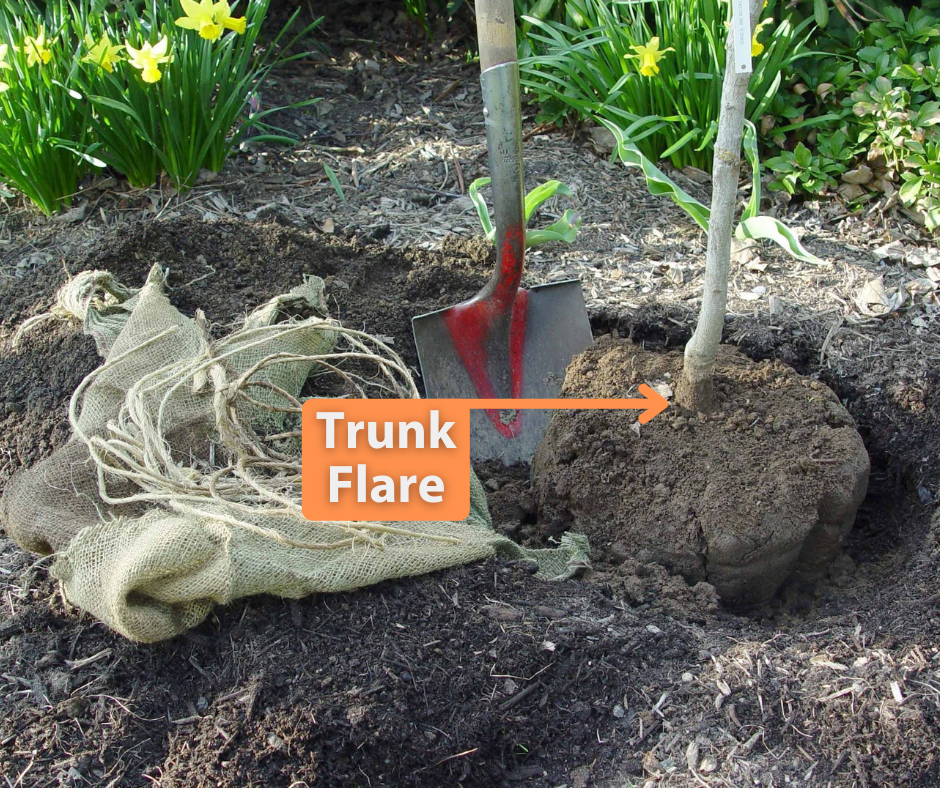
Digging the Planting Hole
Dig the hole so the root mass can sit atop undisturbed soil. When the planting is finished, the trunk flare should be somewhat higher than the current soil grade. See the graphic below for reference.
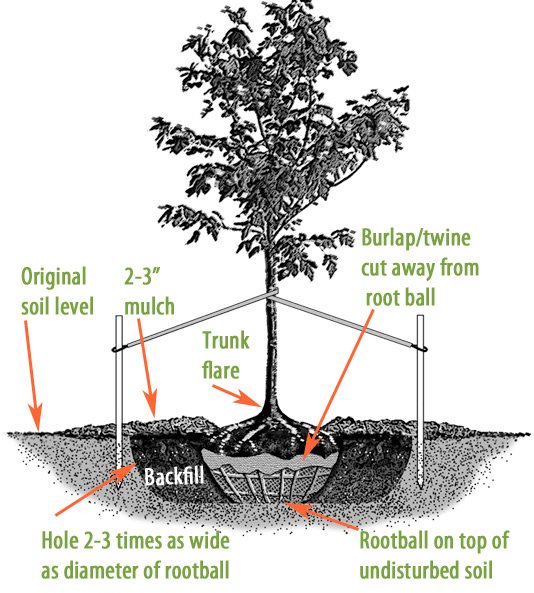
Soil Amendments
Soil is a powerhouse for growing plants. But most don’t know that soil has multiple parts. To make sure your soil has enough of each part that encourages healthy growth, amend your soil with Organic matter. This can include leaves, straw, and grass clippings.
Organic matter increases nutrients in the soil and its water-holding capacity. According to research, when adding organic matter to the soil, distribute it throughout the rooting zone rather than just in the planting hole. By doing this, you introduce a consistent growth environment for your tree or shrub.
Note: Excess or improper soil amending can cause roots to slow or, worse, remain inside the planting hole. Soil structure in the planting hole might differ too dramatically from the surrounding native soil and discourage root growth.
As a general guideline, organic matter should make up about 10% to 20% of the total soil volume. For example, if you are digging a 10-inch-deep hole, be prepared to fill 1-2 inches with organic materials like compost, leaf mold, or decomposed pine bark. Enhance drainage in clay-based soils by tilling.
For more information on amending soil, refer to our blog, “5 Ways You Can Easily Prepare Your Soil for Spring Growth.”
How to Plant the Tree or Shrub
Move your plant into the planting hole with as little disturbance to the rootball as possible. Lift B&B trees and bushes using the rope, burlap, or wire cage that came with the young tree. Potted plants allow for easier transportation but must be handled with similar caution. Never lift the tree or shrub by the trunk, stems, or branches.
Bagged & Burlapped. Once it’s time to plant, remove the rope and burlap from the base of the B&B tree. If you need to find the flare, carefully push the soil and dirt away from the base of the trunk. Place the tree in the hole’s center. Straighten or stabilize the tree as needed by adjusting or filling beneath the root ball with the backfill mix. Ensure the soil base where the root ball sits is firm to limit the tree from “sinking” after large rainstorms.
Potted. Place the container on its side and slip the plant out. Insert the plant into the hole by raising the root mass rather than the plant itself.
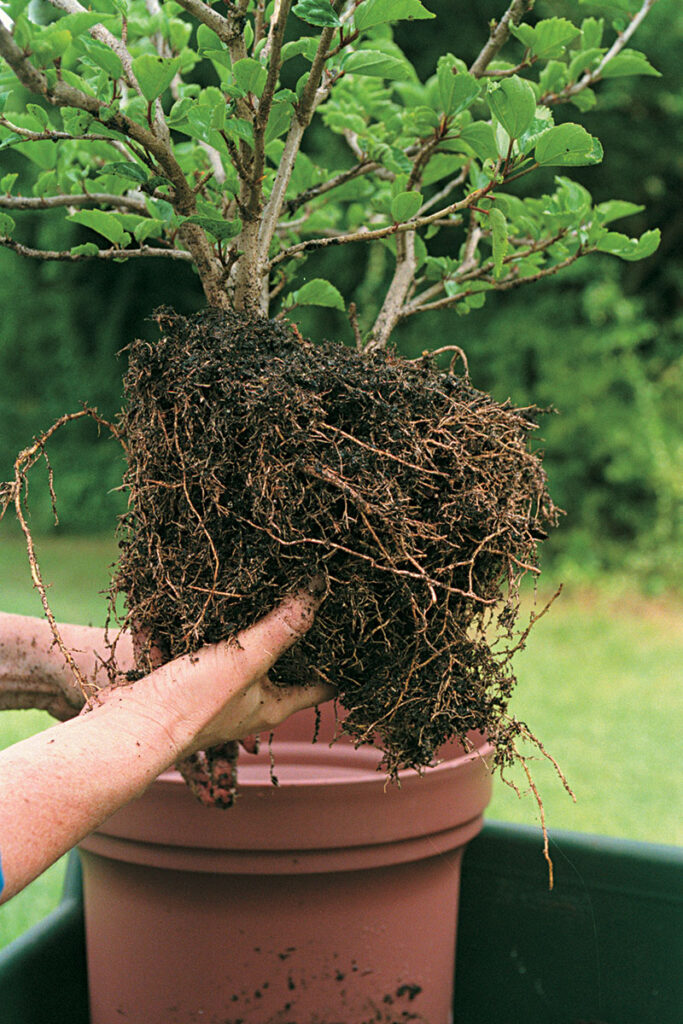
If the plant has become pot-bound, gently cut the container before removing the plant.
Backfilling the Hole
Backfill describes the dirt used to fill the remaining space between the rootball and the hole. Ideal backfill consists of the original excavated soil mixed with 10% to 20% compost.
Before backfilling, loosen and break up any dirt clumps remaining in the soil. Clumps left in soil lead to the formation of air pockets which impede root development and establishment. Place the plant at the proper depth in the planting area or hole and backfill the remaining space.
Lightly tap the backfill soil to create a consistent growing environment. Air pockets, like described above, impede root growth.
Once the soil and tree have been stabilized, build a 2-to-4-inch raised wall around the outside of the root mass. The rootball must receive water directly at first. Until the roots have developed into the backfill soil, watering further from the rootball is not recommended.
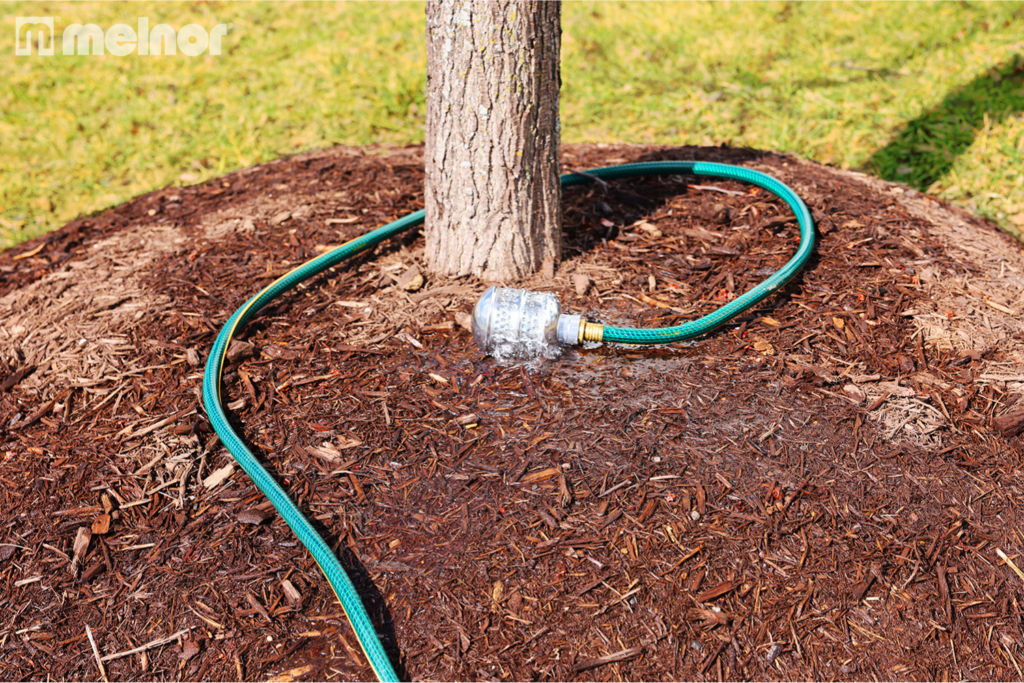
The unique bubbling action provided by the Melnor® Metal Bubbler gently soaks the ground while delivering water right to the rootball. This makes watering easy in the early stages of tree development.
Watering
Whether you construct an elevated soil ring or utilize the help of a bubbler, remember to water in stages. After mulching, water the plant gently and thoroughly. Trees and shrubs perish within the first few months after planting due to excess or minimal water. Plants in well-draining soil typically receive too little water, while those planted in poorly draining soil receive too much.
Research your chosen planting site as you begin the watering process. Ultimately, keep the root ball wet (but not saturated) for the first several months after transplanting.
Stage two, when the rootball has developed into the backfill soil, water the entire planting hole to evenly saturate all the roots.
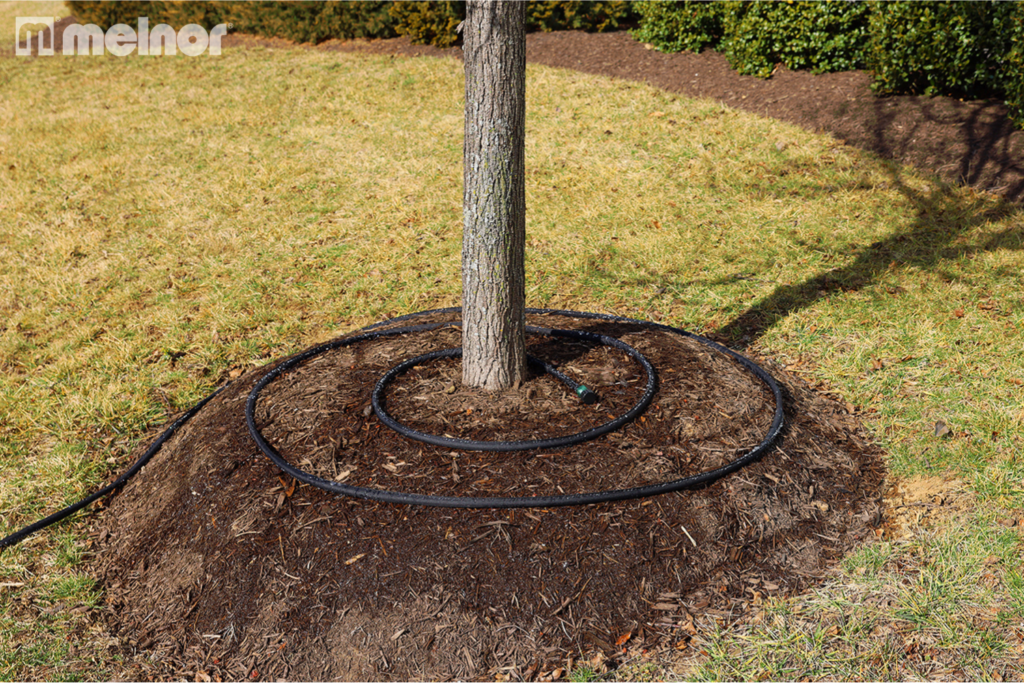
This can be difficult using a simple watering can. Instead, we recommend using a soaker hose to disperse water evenly to every part of the planting hole.
Properly watered plants establish more quickly and become more resistant to drought, pests, and disease.
Maintenance
Mulching. Mulching aids in the control of weeds, the retention of moisture in the soil, the regulation of soil temperatures, and the addition of organic matter to the soil. Proper mulching covers the planting area with 2-to-4 inches of mulch. Stem rot may occur if mulch comes into contact with the stem or trunk, so remember to leave room for drying. Looking to save money? Free mulching options include pine needles, pine bark, hardwood bark, wood chips, or crushed leaves.
Staking. If required, insert 3-5 stakes surrounding the young tree or shrub and attach ropes to both the tree and stake. Tighten firmly until each stake is equally taught. Although this helps, according to industry experts, trees produce stronger trunks and roots if they are not anchored in this manner. Regardless, staking may be required if you live in windy locations. After the first year of growth, remove the stakes.
Pruning. At the time of transplant, very little, if any, pruning is required. Following this guide and patiently planning where to plant your young trees or shrubs (refer to the section about avoiding power lines and other structures) will also limit the pruning needed.
As your tree matures, pruning is recommended to provide uniform growth, structural strength, and a beautiful visual appearance. Although, the latter is not required.
Conclusion
Trees are long-term investments. The success of that investment depends on the care you provide each step along the way. Use the tips outlined in this blog to ensure success.
We hope you enjoyed this article. If you learned a thing or two about planting young trees and shrubs, we encourage you to share it with your friends and family. Want to save this blog for future reference? Tap the button below to open and download a pdf version.
Sources
arborday.org, E. of. (n.d.). Tree Facts. Arbor Day Foundation. Retrieved February 10, 2022, from https://www.arborday.org/trees/treefacts/
TreesAreGood.org, E. of. (n.d.). Planting a Tree. TreesAreGood.org. Retrieved February 9, 2022, from https://www.treesaregood.org/treeowner/plantingatree
Lamp’l, J. (2017, September 11). Planting Trees and Shrubs. Milorganite. Retrieved February 9, 2022, from https://www.milorganite.com/blog/trees-shrubs/planting-trees-and-shrubs
Gardeners.com, E. of. (2021, July 6). How to Plant a Tree or Shrub. www.gardeners.com. Retrieved February 9, 2022, from https://www.gardeners.com/how-to/tree-planting/8741.html
Polomski, O. A. R. F., Polomski, R. F., Shaughnessy, D., & Williamson, J. (2019, December 16). Planting Trees Correctly. Home & Garden Information Center | Clemson University, South Carolina. Retrieved February 9, 2022, from https://hgic.clemson.edu/factsheet/planting-trees-correctly/


